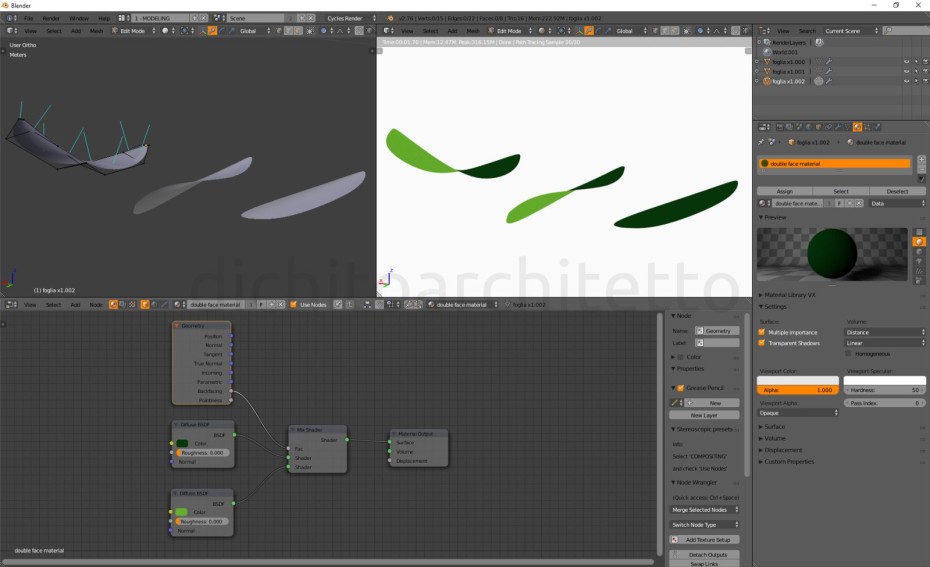
Today I want to share a little trick to create plane objects with double face in Blender. An example? A leaf: with this method you can apply a first material to the leaf upper face and a second material, different from the other one, to the leaf lower face.
Node base configuration is super easy: two “diffuse” nodes are mixed together with a “mix shader” node; “backfacing” output (“geometry” node) is the mix factor. That’s all!
Of course you can customize materials to suit your needs; you can also apply the same trick to “displacement” channel.
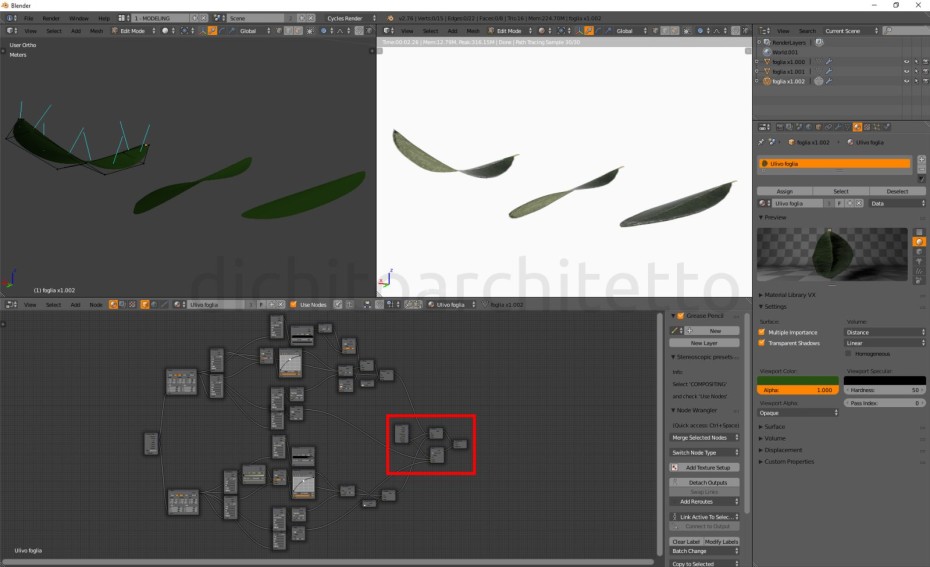
You can see below an olive leaf created by me and used in one of my last renderings.


